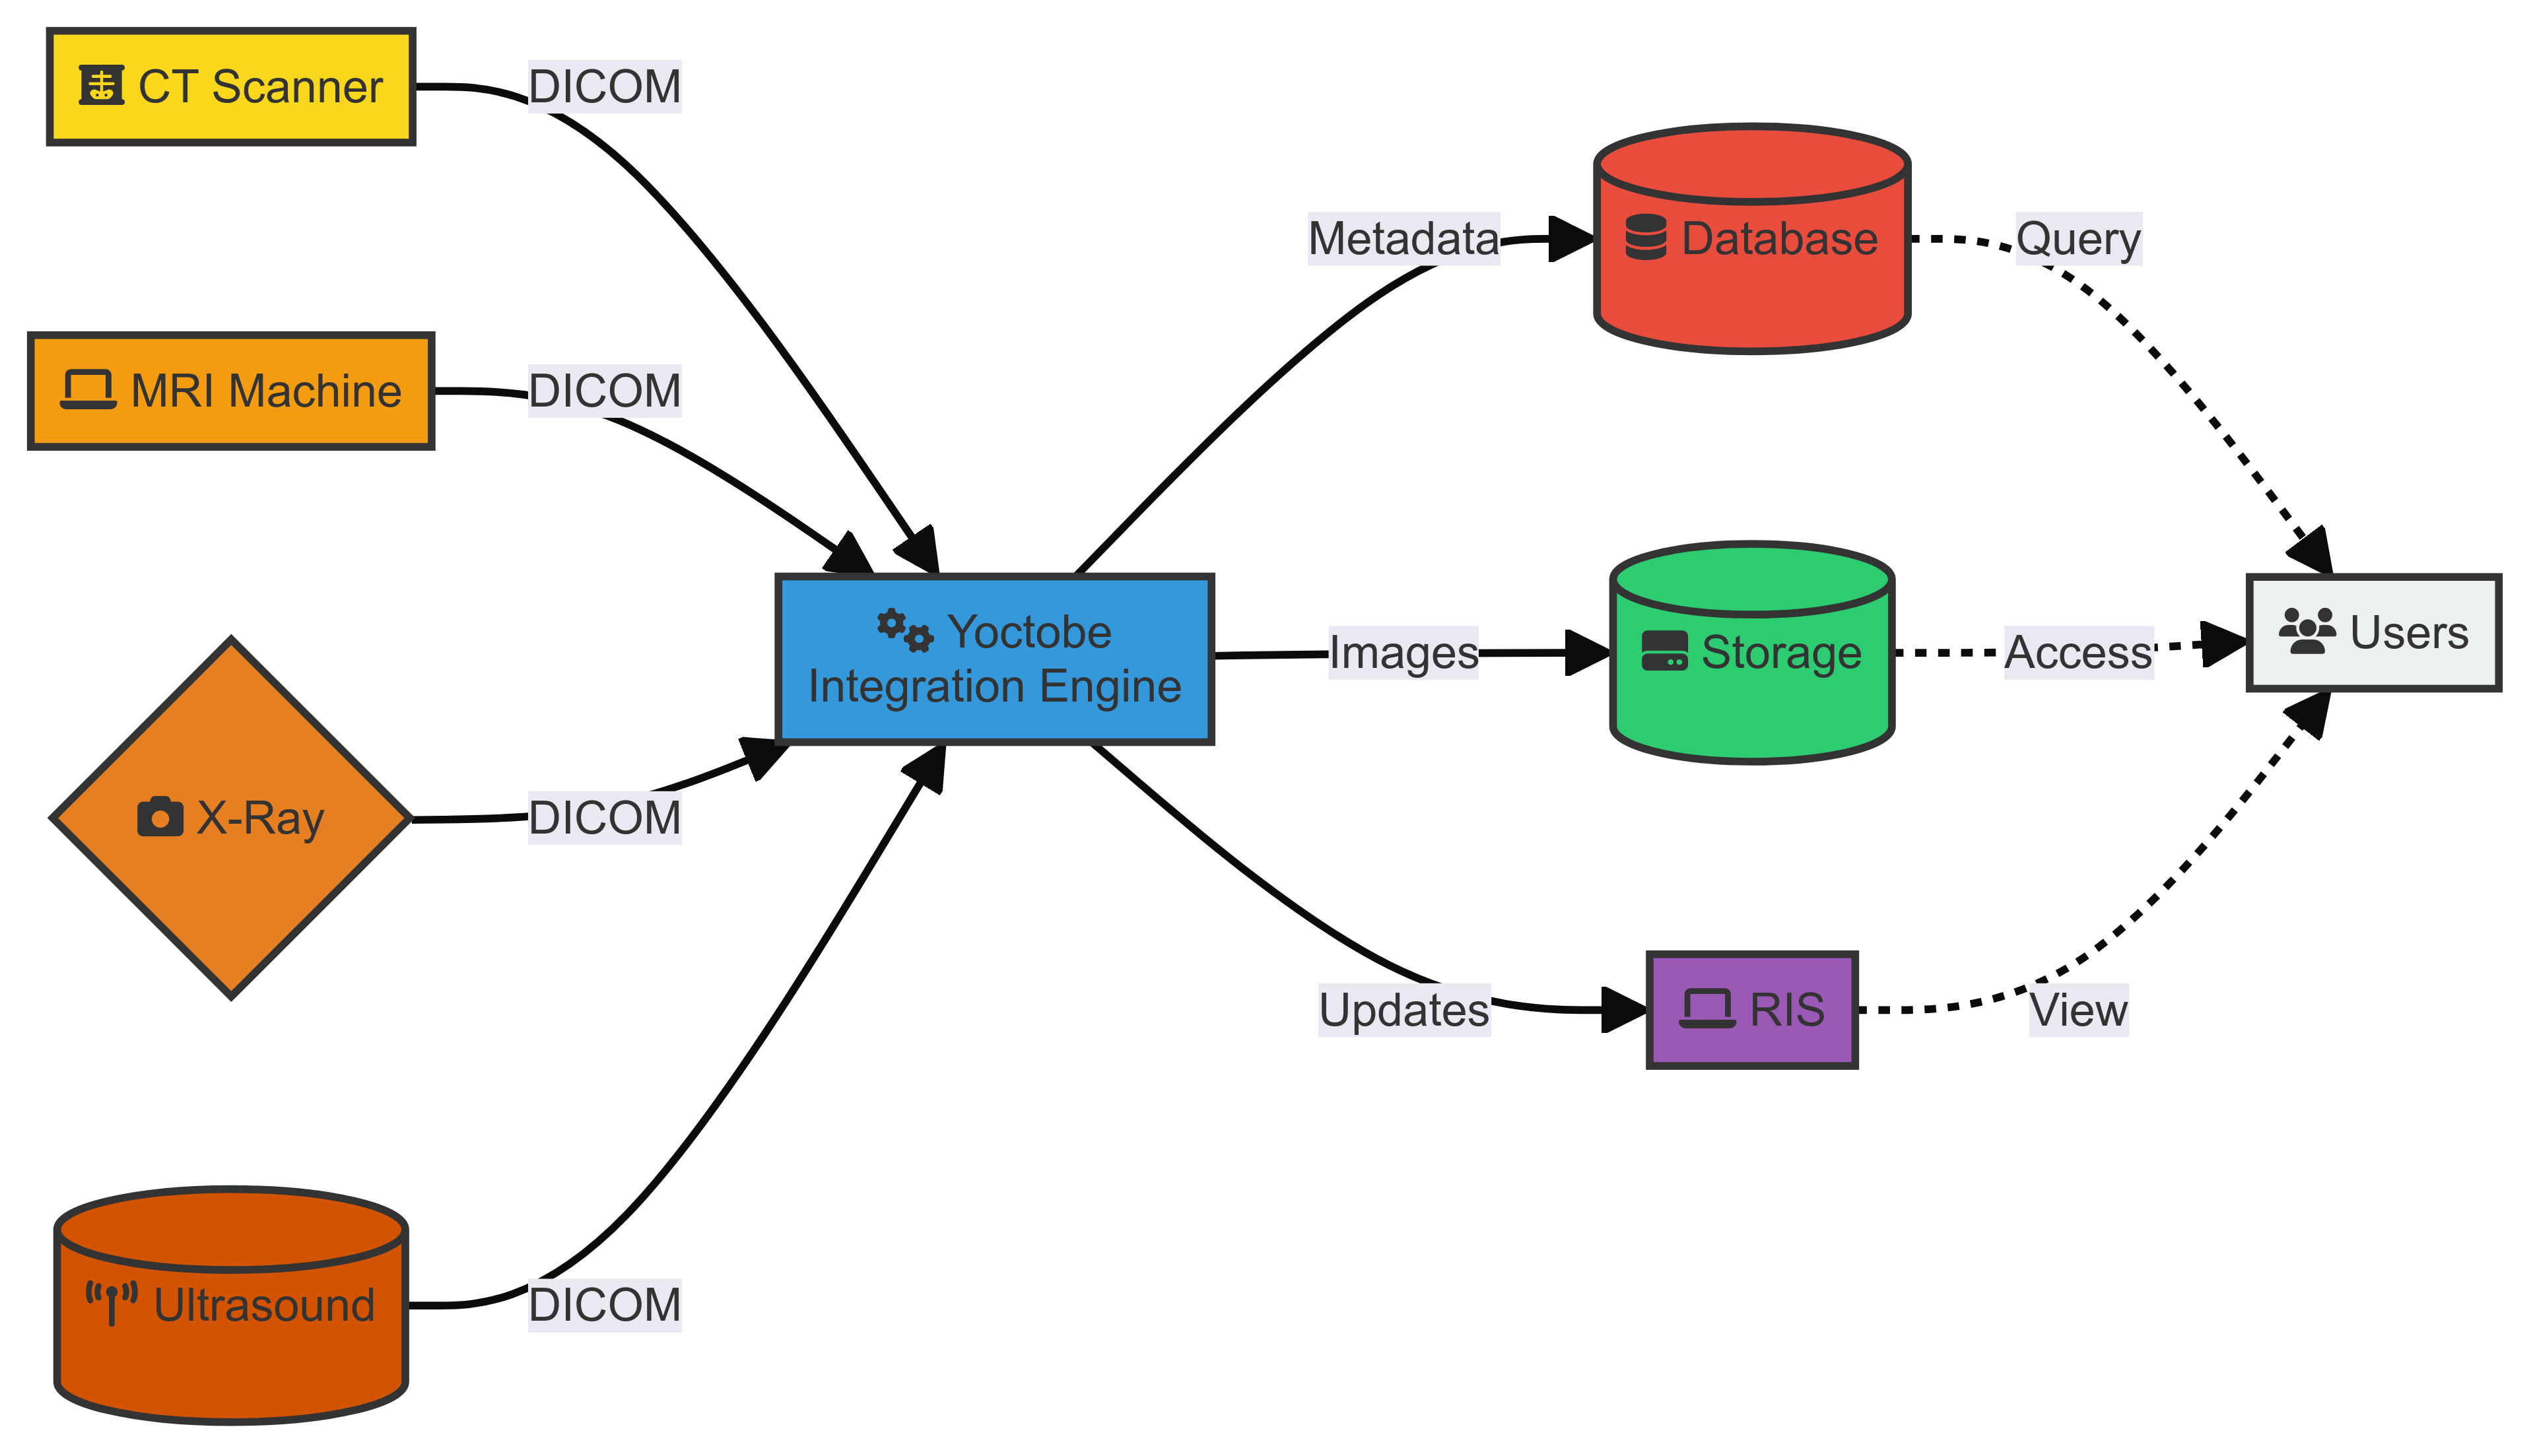
This case study demonstrates how a radiology clinic can leverage Yoctobe’s AI-powered integration engine to efficiently manage medical images, extract patient metadata using DICOM, and integrate this information with their Radiology Information System (RIS) and local storage.
Requirements
- Extract images and patient metadata from various imaging devices using DICOM
- Organize and save images in a locally shared directory (intranet)
- Register metadata and image locations in a MySQL database
- Integrate data with the Radiology Information System (RIS)
- Ensure efficiency, accuracy, compliance, security, and real-time data availability
System Setup

- Imaging Devices: Multiple DICOM-compatible imaging devices (e.g., CT scanners, MRI machines, X-ray systems) are connected to the clinic’s secure network.
- Yoctobe Integration Engine: Deployed on a dedicated server or cloud instance with high availability and scalability features.
- Local Shared Storage: A high-performance Network Attached Storage (NAS) system accessible via the clinic’s intranet.
- MySQL Database: A robust, properly sized MySQL server to handle concurrent connections and transactions.
- Radiology Information System (RIS): The clinic’s existing RIS, accessible via API endpoints.
Real-time Data Flow
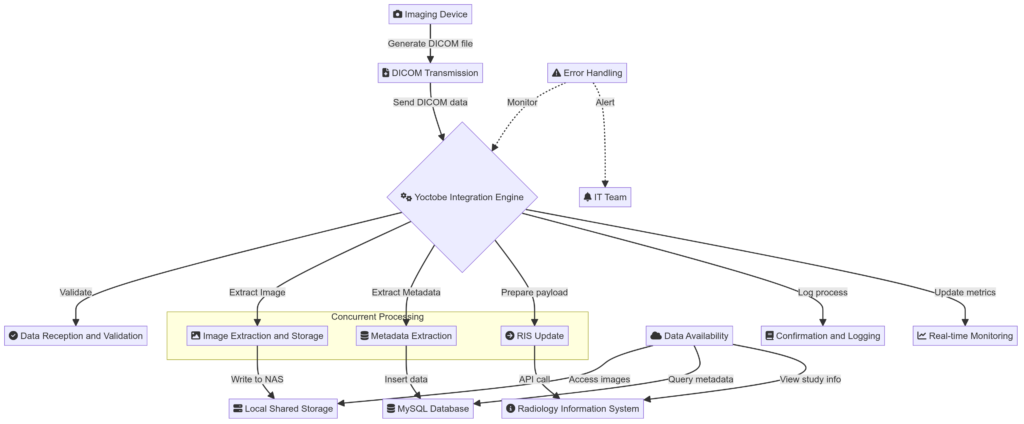
1. Image Acquisition
- A patient undergoes an imaging procedure on one of the clinic’s DICOM-compatible devices.
- The imaging device generates a DICOM file containing both the image data and associated metadata.
2. DICOM Transmission
- The imaging device immediately initiates a DICOM association with the Yoctobe Integration Engine.
- The DICOM file is transmitted in real-time over the secure clinic network to the integration engine.
3. Data Reception and Validation
- Yoctobe’s Integration Engine receives the incoming DICOM data stream.
- The engine performs immediate validation checks:
- Verifies the DICOM file structure
- Checks for required metadata fields
- Validates data types and formats
4. Image Extraction and Storage
- Upon successful validation, the integration engine extracts the image data from the DICOM file.
- Simultaneously, it generates a unique filename based on patient ID, study date, and modality.
- The image is immediately written to the appropriate directory in the local shared storage.
- Example path:
/shared_storage/patientID_12345/20230724/CT/image_001.dcm
- Example path:
5. Metadata Extraction and Database Insertion
- Concurrently with image storage, the engine extracts relevant metadata from the DICOM file.
- It prepares an SQL insert statement with the extracted metadata and the newly created file path.
- The engine establishes a connection to the MySQL database and executes the insert statement.
- The database transaction is committed, making the metadata immediately available for querying.
6. RIS Update
- Upon successful database insertion, the integration engine prepares a data payload for the RIS.
- It maps the DICOM metadata to the format expected by the RIS API.
- The engine makes an API call to the RIS, updating it with the new study information.
- It waits for a success response from the RIS before proceeding.
7. Confirmation and Logging
- After successful completion of all steps, the integration engine logs the entire process.
- It includes timestamps for each step, allowing for performance monitoring and auditing.
- If configured, it sends a confirmation message back to the originating imaging device.
8. Error Handling
- At each step, if an error occurs:
- The engine logs the error with detailed information.
- It attempts to roll back any partially completed steps (e.g., deleting partially written files).
- If configured, it sends alerts to the IT team for immediate attention.
- For non-critical errors, it may queue the operation for retry.
9. Real-time Monitoring
- Throughout the process, the integration engine updates its internal status metrics.
- These metrics are available in real-time through a monitoring dashboard, showing:
- Current processing rate
- Queue lengths
- Error rates
- System resource utilization
10. Data Availability
The study information is visible in the RIS for radiologists and administrative staff.
As soon as the process completes:
- The image is available on the shared storage for viewing by authorized personnel.
- The metadata is queryable in the MySQL database for analytics or other systems.


