
Gproftpd is the graphical interface of proftpd, a very powerful ftp server, it requires some advanced knowledge to master it.
You can try to do a basic and functional configuration of proftpd, in order to understand a minimum and to check if you really need Gproftpd.
Installation of gadmin-proftpd
Install the gadmin-proftpd package.
During the installation a window will appear and ask you if you want proftpd to be independent or started by inetd. It is recommended to choose independent if you do not need inetd.
Prerequisites
A configured and activated Internet connection.
Launch the application via the dashboard or via the terminal (all versions of Ubuntu) with the following command:
gksudo gadmin-proftpd
First launch
When first opened, Gadmin ProFTPD will ask you if you want to create a specific ProFTPD configuration file. If you have never used ProFTPD on the command line do Yes, otherwise save your old configuration somewhere before doing so.
You must also after the first launch create the TLS certificate allowing secure connections with ProFTPd. (This is a security that prevents the interception and hackers of a connection to the server for malicious purposes). This step is mandatory even if you do not use this function because of a slight bug.
To do this, go to the Servers tab, choose a server from the list, and look for the Password box and type a password (any). You can also fill in the other boxes in the certificate categories but this is not mandatory.
Then click Apply located below the Generate new certificates line.
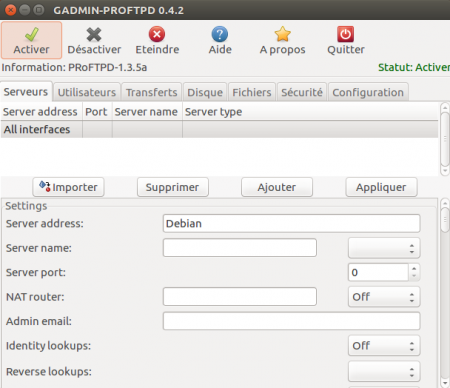
The interface
Servers tab
This tab is used to create multiple virtual servers. By default, there is one that is pre-created.
To edit its configuration, simply change the settings below and apply the new configuration.
The interesting parameters:
- Download and upload speed, which allows you to set the maximum download and upload speed in FTP;
- port that allows you to choose the port address to access the server;
passive port range that allows you to choose the ports that will be used for sending and receiving data; - Default Home and Upload directory allow you to choose the default folders for the ftp server.
- Users tab used to set up users, their folders, their passwords and their permissions.
Create a user
To create a user, simply fill in the table below and add:
- Username: The username. It must be a user of the system but you can create a new one. In this case it will be necessary to click twice on add;
- Password: set password
If the password is different from the system password, Gadmin ProFTPD will change the system password accordingly … which may leave you with some surprises! - Group: The group to which the user belongs. It must be a system group (for example: ftp)
- Home directory: default access folder; do not forget to check the upload box to be able to upload, you must do it for each new folder!
- require password: check this option if a password is required;
- Allow logins from: allows to put an IP address by which this user can connect and prevents the connection from others. To allow all type all.
The main buttons
- Enable: starts the ftp server;
- Disable: stops the ftp server;
- Apply: Apply the changes made between the start of the ftp server and now;
- Turn off server shutdown with 3 options: Actual shutdown time: Time to wait for the actual shutdown of the server, New access prohibited: New access disabled, Disconnected Users: Disconnecting Current Users
Frequent bugs
Sometimes Gadmin ProFTPD can not be activated, so various errors are displayed on the terminal. To correct this problem simply create the Gadmin ProFTPD var folder via this command:
sudo mkdir / var / run / proftpd /
When I run Gadmin ProFTPD and the following message appears: “Do you want to run your current configuration with a suitable standard configuration for gadmin-proftpd?”. If clicking Yes, the application will close automatically, then it is a bug. There is a workaround. Please follow the following steps:
- when the message appears, click on No;
- You have to position yourself on the “configuration” tab;
- Then empty all the contents of the configuration file;
- Click on “save” and then on “standard”;
- The message appears again, but this time you have to click on “yes”;
- The new configuration appears;
- You have to click on “Save” and that’s it corrected.


