
vsftpd is one of the most secure and fastest FTP server for UNIX-like systems. I will show in this tutorial how to use puTTY (SSH and telnet client). I will use TightVNC to establish a remote connection to my host. With TightVNC, I can connect and install any application from my local computer.
Download and install puTTY
To download putty go to http://www.putty.org.
Download and install TightVNC
To download TightVNC go to : http://www.tightvnc.com/download.php
Run TightVNC: (for more information check the documentation online)
![]()
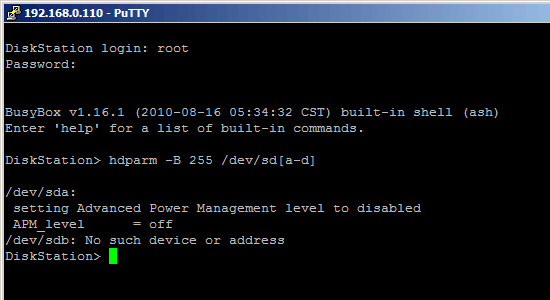
Start puTTY and connect to the remote host
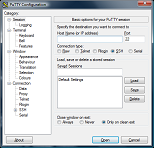
Run puTTY, and enter your connection settings
 Click Open to start the SSH session.
If this is your first time connecting to the server from this computer, you will see the following output. Accept the connection by clicking Yes.

install vsftpd
Once on the console, as a matter of best practice we’ll update our packages:
yum -y update
Install vsftpd and any required packages:
yum -y install vsftpd
Configure vsftpd
vim /etc/vsftpd/vsftpd.conf
Useful commands on vim editor
i to insert
a to append
x to delete
dd to delete a line
: to begin a command sequence
:w to save
:q to quit
:q! to quit without saving
:wq to save and quiti to insert
a to append
x to delete
dd to delete a line
: to begin a command sequence
:w to save
:q to quit
:q! to quit without saving
:wq to save and quit
What to modify vsftpd.conf
Disallow anonymous, unidentified users to access files via FTP; change the anonymous_enable setting toNO:
anonymous_enable=NO
Allow local uses to login by changing the local_enable setting to YES:
local_enable=YES
If you want local user to be able to write to a directory, then change the write_enable setting to YES:
write_enable=YES
Local users will be ‘chroot jailed’ and they will be denied access to any other part of the server; change the chroot_local_user setting to YES:
chroot_local_user=YES
Exit and save the file with the command :wq .
Restart the vsftpd service:
systemctl restart vsftpd
Then set the vsftpd service to start at boot:
systemctl enable vsftpd
Allow the default FTP port, port 21, through firewalld:
firewall-cmd --permanent --add-port=21/tcp
And reload the firewall:
firewall-cmd --reload
Install Apache, MySQL, PHP
yum. A package manager allows us to install most software pain-free from a repository maintained by CentOS.
For our purposes, we can get started by typing these commands:
sudo yum install httpdsudo command: operations get executed with root privileges.
Afterwards, your web server is installed.
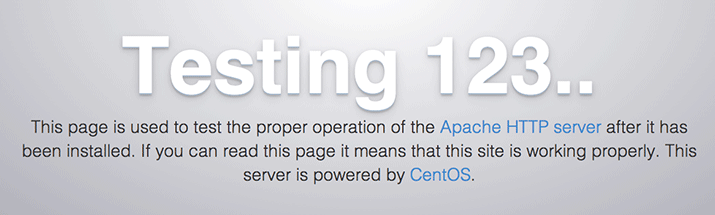
Once it installs, you can start Apache on your VPS:
sudo systemctl start httpd.service
http://your_server_IP_address/ now works !
Enable Apache to start on boot. Use the following command to do so:
sudo systemctl enable httpd.service
Install MySQL (MariaDB)
sudo yum install mariadb-server mariadbsudo systemctl start mariadbRun a simple security script that will remove some dangerous defaults and lock down access to our database system a little bit. Start the interactive script by running:
sudo mysql_secure_installationEnter Y, and follow the instructions:
Enter current password for root (enter for none):
OK, successfully used password, moving on...

Setting the root password ensures that nobody can log into the MariaDB
root user without the proper authorization.

New password: password
Re-enter new password: password
Password updated successfully!
Reloading privilege tables..
 ... Success!
sudo systemctl enable mariadb.serviceInstall PHP
sudo yum install php php-mysqlsudo systemctl restart httpd.serviceInstall PHP Modules
To see the available options for PHP modules and libraries, you can type this into your system:
yum search php-The results are all optional components that you can install. It will give you a short description for each:
php-bcmath.x86_64 : A module for PHP applications for using the bcmath library
php-cli.x86_64 : Command-line interface for PHP
php-common.x86_64 : Common files for PHP
php-dba.x86_64 : A database abstraction layer module for PHP applications
php-devel.x86_64 : Files needed for building PHP extensions
php-embedded.x86_64 : PHP library for embedding in applications
php-enchant.x86_64 : Enchant spelling extension for PHP applications
php-fpm.x86_64 : PHP FastCGI Process Manager
php-gd.x86_64 : A module for PHP applications for using the gd graphics library
. . .
Test PHP Processing on your Web Server
Open the file info.php CentOS, this directory is located at /var/www/html/. We can create the file at that location by typing: sudo vi /var/www/html/info.php
This will open a blank file. We want to put the following text, which is valid PHP code, inside the file:
<?php phpinfo(); ?>When you are finished, save and close the file.
If you are running a firewall, run the following commands to allow HTTP and HTTPS traffic:
sudo firewall-cmd --permanent --zone=public --add-service=http
sudo firewall-cmd --permanent --zone=public --add-service=https
sudo firewall-cmd --reload
I can test whether my web server can correctly display content generated by a PHP script. To try this out, we just have to visit this page in our web browser. You’ll need your server’s public IP address again.
The address you want to visit will be:
http://your_server_IP_address/info.phpInstall phpMyadmin
phpMyAdmin is an open source tool used for the administration of MySQL.
Add the EPEL Repository
phpMyAdmin is part of Extra Packages for Enterprise Linux (EPEL), which is a community repository of non-standard packages for the RHEL distribution. First, we’ll install the EPEL repository:
rpm -iUvh http://dl.fedoraproject.org/pub/epel/7/x86_64/e/epel-release-7-5.noarch.rpm
Install phpMyAdmin
yum -y install phpmyadmin
Basic Configuration for phpMyAdmin
vim /etc/httpd/conf.d/phpMyAdmin.conf
By default, the configuration for phpMyAdmin only allows access from the server on which it is installed. Find the following sections and change each IP address to the one you found in Step 3, or another IP address that will be connecting to phpMyAdmin remotely:
Require ip 127.0.0.1
Allow from 127.0.0.1
Require ip 127.0.0.1
Allow from 127.0.0.1
Then exit and save the file with the command :wq .
Restart Apache:
systemctl restart httpd
Verify that phpMyAdmin is working by visiting http://the_IP_of_your_server/phpmyadmin. For example: http://5.5.5.5/phpmyadmin


